понедельник, 31 мая 2021 г.

thumbnail

Farmers' Market Shrimp Orzo

For me, inspiration for cooking comes from a lot of different places. It can be a dish I had at a restaurant that I want to re-create, or the idea of a place I have traveled or want to travel and I try to think of ways to incorporate the essence of that place into a meal so I can experience it at home. I've mentioned in my other Farmers' Market pieces that inspiration comes from perusing the stands at the market for new and interesting fruits, vegetables, or herbs. And sometimes inspiration comes from food I've seen cooked on The Food Network or pictures of dishes in magazines or on Pinterest. Honestly, I'm so in love with food and cooking that inspiration can come from anywhere.


The inspiration for today's dish came from my pseudo-stepsister/friend, Lindsay. She sent me this recipe she made for herself and her hubby and thought I could play around with the basic idea and make it my own. It was such a unique idea and I loved it, so I got to work thinking of ways to give it that voraceRachel touch! I decided to go with a Greek version, since this recipe included orzo and orzo is prominent in Greek food. I chose to add wine, onion, feta, and oregano, all of which were not in the original recipe.


I got this idea the day before my weekly trip to the farmers' market so I decided to look for the ingredients I would need while I was there. Usually I go to the farmers' market with no idea what I'm going to make and let the ingredients I find dictate what I'm going to cook. But this time it was different. I knew what I wanted to make ahead of time and went to the market in search of specific ingredients: grape tomatoes, an onion, and fresh oregano. The fresh oregano was a no-go, but there were plenty of grape tomatoes and onions to choose from. I went with a bright white onion and a pint of tomatoes of all different shades and colors. Aren't they lovely?


One thing I really love about this recipe is that it's all made in one pot! That makes clean up so quick and easy. You just leave your leftovers in the pot, stick it in the fridge, wash your cutting board and a few utensils and call it a night! Love that.


One thing to note: Make sure you have a Dutch oven or a large skillet with high sides that can go in the oven. You're going to start this recipe on the stove and then transfer it to the oven, so an oven-proof pot or skillet with a tight-fitting lid is a must.


OK ladies and gents! Let's get cookin'!


Greek Inspired Shrimp Orzo


Servings: 6

Prep. time: 10 minutes

Cooking time: 40 minutes


Ingredients:

10 teaspoons extra virgin olive oil

6 cloves garlic, minced

1 medium white onion, chopped

1 teaspoon sea salt

1 teaspoon fresh cracked black pepper

1/8 teaspoon crushed red pepper flakes

1 pint cherry tomatoes

2 teaspoons chopped fresh oregano

3/4 pound dry orzo pasta

2 cups chicken stock

1 cup dry white wine (Sauvignon Blanc, Chardonnay - your choice!)

1 pound raw uncooked shrimp, peeled and deveined

pinch ground red pepper (cayenne)

1/3 cup feta cheese crumbles


Preheat your oven to 400 degrees Fahrenheit.


Place a Dutch oven on the stove over medium heat. Add 6 teaspoons of EVOO and all of the garlic to the pot. Let the garlic cook for one minute.


Add all of the chopped onions and let cook for two minutes.


Season the onions with 1/4 teaspoon sea salt, 1/4 teaspoon fresh cracked black pepper (heretofore referred to as FCBP), and 1/8 teaspoon crushed red pepper flakes. Stir to incorporate that into the onions.


After the onions have cooked for five minutes total and they have become slightly softened, add in the whole grape tomatoes. Sprinkle them with 1/4 teaspoon sea salt and 1/4 teaspoon FCBP. Turn the heat up to high and let them cook for five minutes, stirring occasionally.


Once the tomatoes have started to soften, stir in 1 teaspoon of the chopped fresh oregano.


Reduce the heat to medium and add in the orzo. Stir it into the veggies.


Next, pour in the chicken stock and wine. Add 1/2 teaspoon of oregano and stir.


Bring this just to a simmer, stirring regularly to make sure that none of the pasta sticks to the bottom of the pot.


Once this concoction is simmering, remove it from the heat and place the lid on the pot. Place the pot in the oven on the top rack. Cook for ten minutes.


While the orzo is cooking, prepare the shrimp. Place them in a mixing bowl. Drizzle with EVOO and sprinkle in 1/2 teaspoon salt, 1/2 teaspoon FCBP, and a pinch of cayenne. Toss to coat them in these ingredients.


Once the orzo has been cooking for ten minutes, take the pot out of the oven and remove the lid. Set your oven to broil on high.


Use a fork to search through the pasta for the cherry tomatoes. Use the tines to pop the tomatoes and then squish them so that the juices spill out into the pasta.


Stir in the feta crumbles and then make sure the pasta is somewhat smoothed out on top.


Dump the shrimp on the top of the pasta. Arrange them in a single layer.


Place the pot back in the oven to broil the shrimp.


This will take anywhere from five to ten minutes, depending on the strength of your broiler. Just check on them periodically and remove the pot when the shrimp have curled and turned pink.


To serve, scoop large spoonfuls of the pasta and shrimp out of the Dutch oven onto your dinner plates. Serve hot and enjoy! Salute!


And a BIG thanks to Lindsay for thinking of me with this recipe! Loved it!


thumbnail

Farm Feeding Counting Cards for Sensory Bin


Video thumbnail for IMG_1965

Pretend like you are a farmer and feed the animals with these counting cards for the sensory bin! Cut out the animal heads and tape onto tin cans or plastic wipe containers. Set up in a sensory bin full of popcorn kernels. Add these Farm Feeding Counting cards to see how many scoops to feed to each animal. Great way to add math to a sensory bin, especially for a farm theme! Don't forget to check out the rest of the activities in my Farm Bundle!


*Please help keep costs low by making sure your cart total is at least $3.00. This helps eliminate credit card fees. Thanks!


Includes (color and black & white):


  • 4 animal heads (cow, sheep, horse, and chicken) in 2 sizes (for tin cans or plastic wipe containers)
  • 20 Farm Feeding cards (numbers 1-5)
  • 20 Farm Feeding cards (numbers 6-10)
  • 20 Farm Feeding cards (numbers 11-15)
  • 20 Farm Feeding cards (numbers 16-20)

Materials needed for this activity:


  • tin cans, plastic wipe containers, or plastic food containers
  • sensory bin filled with popcorn kernels
  • scoops

Check out more THEMED BUNDLES!


Click the ★ green star ★ at the top of my store to follow me to receive 20% off all new products for the first 24 hours a new product is posted! Visit my store Turner Tots!


Let’s connect! To see this activity plus more in action, check out:


If there is anything you need to make this resource work for your classroom, please e-mail me at turnertots23@gmail.com. I would be happy to help!


пятница, 28 мая 2021 г.

thumbnail

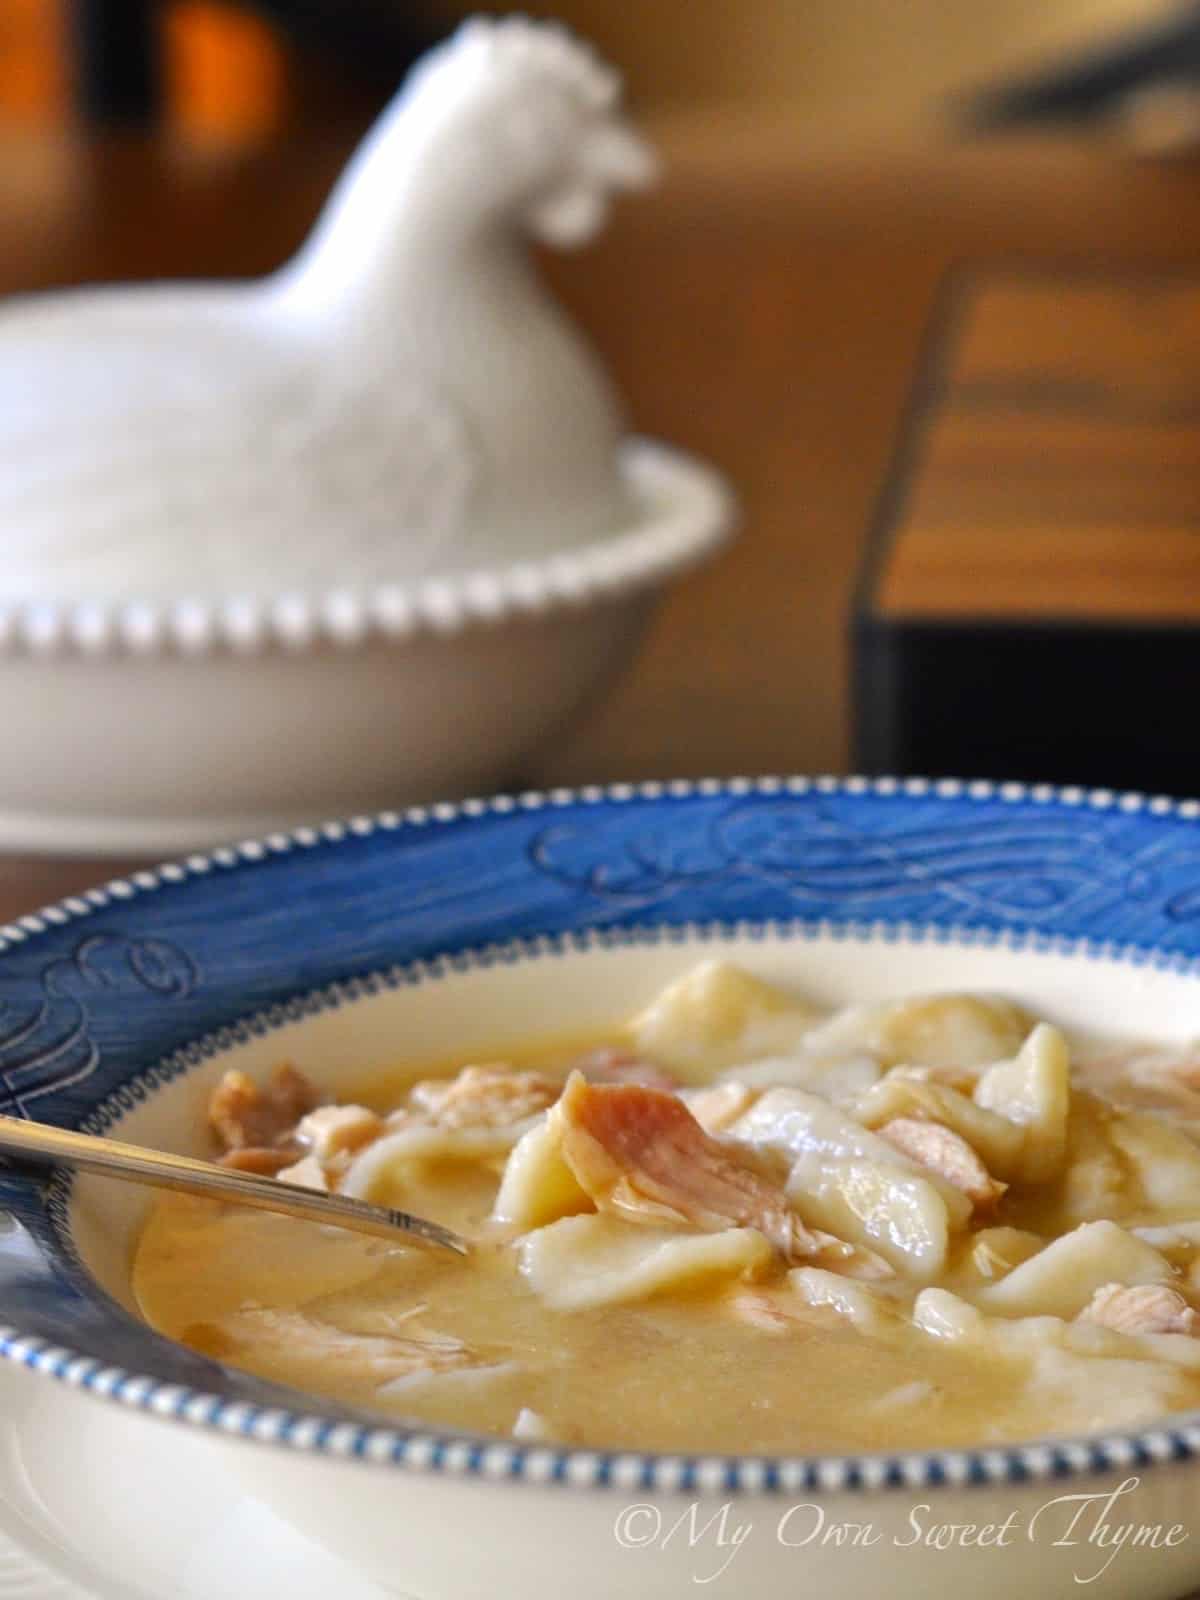
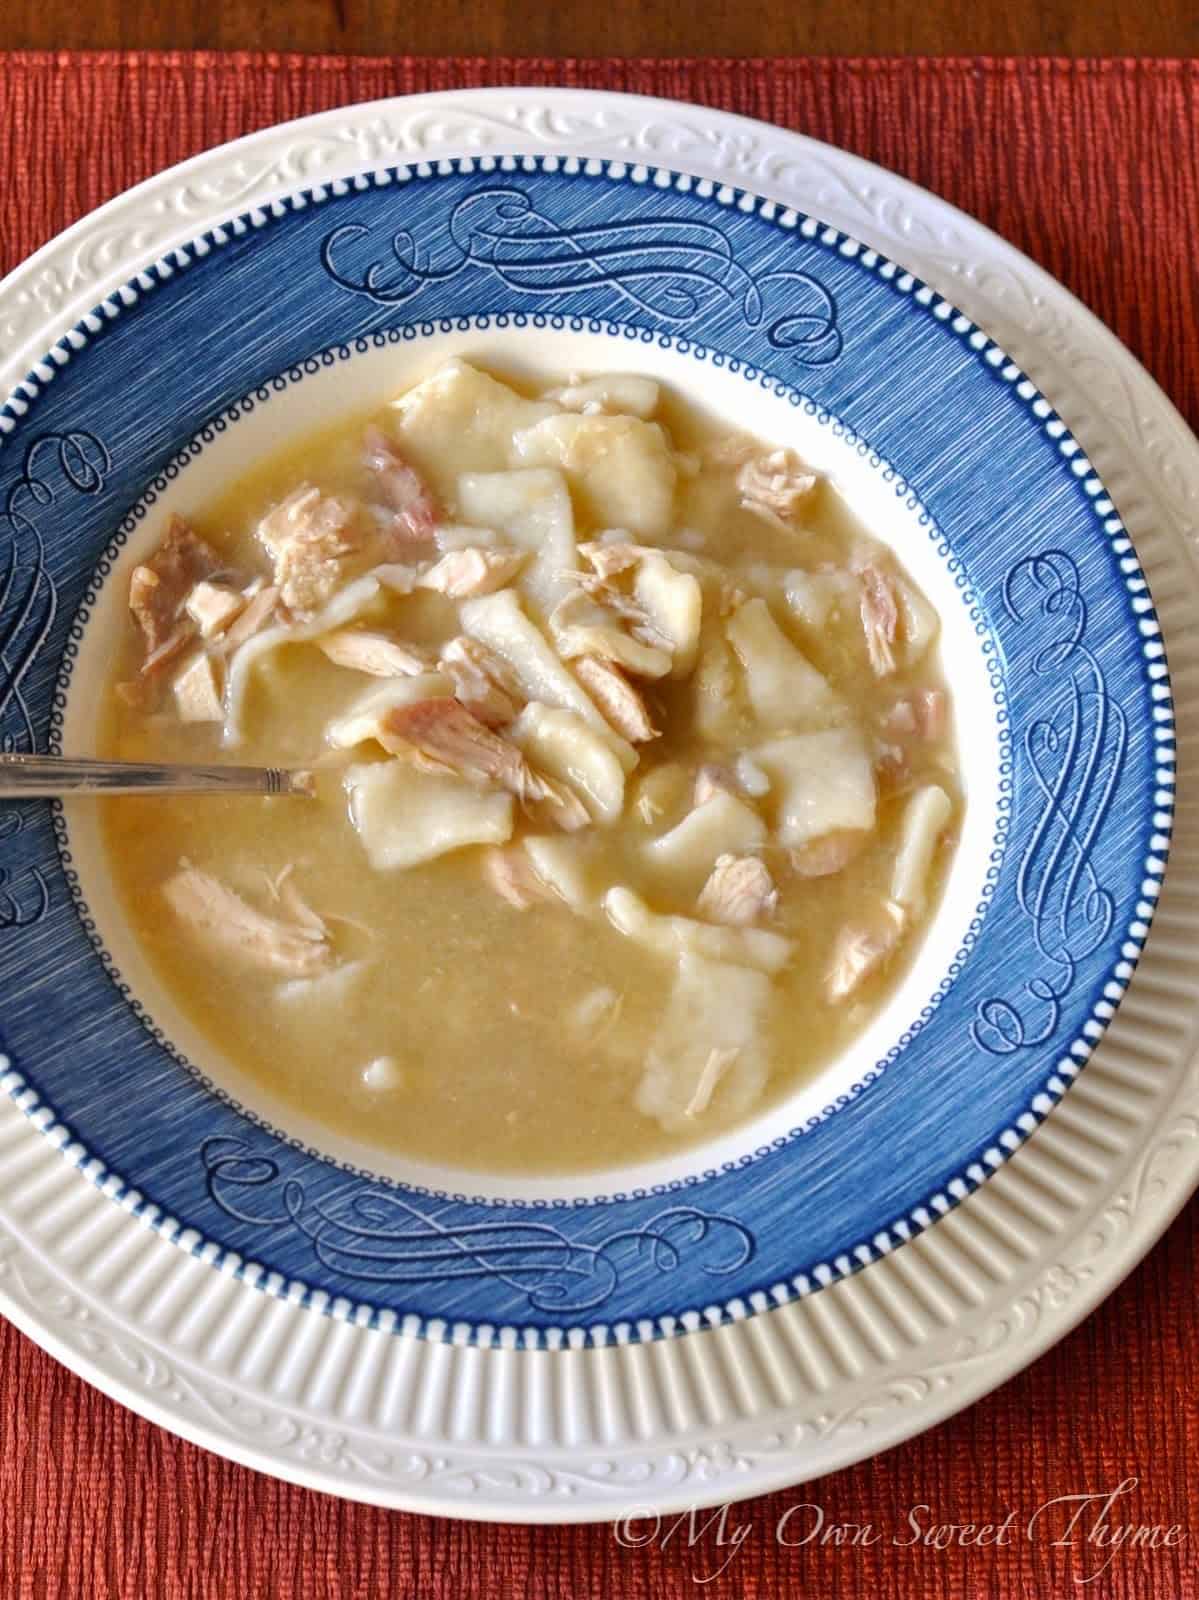
Family Heirloom Cookbook – Chicken and Dumplings

Family Heirlooms


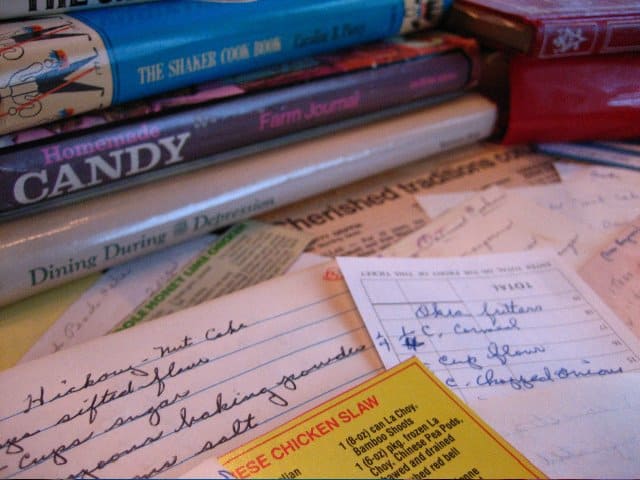
Several years ago, I came to the realization that I had, in my possession, many precious family heirlooms. These heirlooms are not the kind that relatives fight to inherit. They aren’t items that would be featured on “Antiques Roadshow.” In fact, my heirlooms are ones that could easily escape attention and inadvertently be discarded or forgotten. These cherished bits and pieces, lovingly shared or purposefully handed down to me, have been scratched onto used and messy note cards or torn from newspapers or magazines over the years, and are now stuck in a cookbook or tossed into a folder along with other cryptic notes that make up my kitchen files. These heirlooms could easily be mistaken for garbage by almost anyone.


It occurred to me that, in their present form, I might be the only one who understood how special these heirlooms really were. Because of their appearance others might easily miss the fact that these were cherished formulas. They may not realize that, when followed, these instructions produce a tonic for the soul, rich in sensory data that has the power to transport me to the kitchens and tables of my past, to the festive comforting presence of friends and family I haven’t seen in years. There were members of my family who didn’t understand what warm and wonderful family alchemy could be practiced using the recipes in my collection.


An Idea


In the hope of protecting these special recipes I began to put together a Family Heirloom Cookbook. Determined to preserve the treasures recorded on those scraps of paper and recipe cards in my possession I began to sort through my family’s food lore. In addition to organizing and preserving the recipes in my kitchen files I combed through the memoirs of my great great uncle Hal, born in the late 1800’s, a bachelor for many years, who cooked for himself while establishing a farm in Minnesota. I reread cherished letters from my grandmother and my aunts who wrote to me, a young newlywed, when I first moved away from home, telling me about the bountiful harvest from their garden or a new recipe they had tried. I dug out recipes for dinners I was fond of as a child and unique dishes that had been served regularly at my family’s table. I looked through local cookbooks from the area I grew up in for recipes contributed by family members. Then I talked to aunts and cousins and neighbors, to learn what food related memories came to their mind and made them smile.


It was a great experience! The stories and recipes I found warmed my heart and sometimes made my mouth water. It was a wonderful discovery to see how easy it was to reestablish connections on the basis of shared food memories. My brother and I spent hours remembering our favorite breakfast cereals and snacks as well as things we had learned to cook from a copy of “Betty Crocker’s Cookbook for Boys and Girls.” I also had great conversations by phone, letter and email with other family members I had scarcely talked to in years. Food was a great conversation starter and a topic on which we could reconnect as if we were never parted.


A Family Heirloom Cookbook


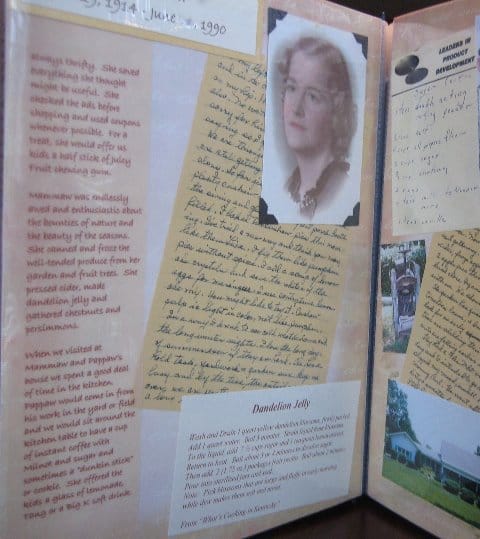
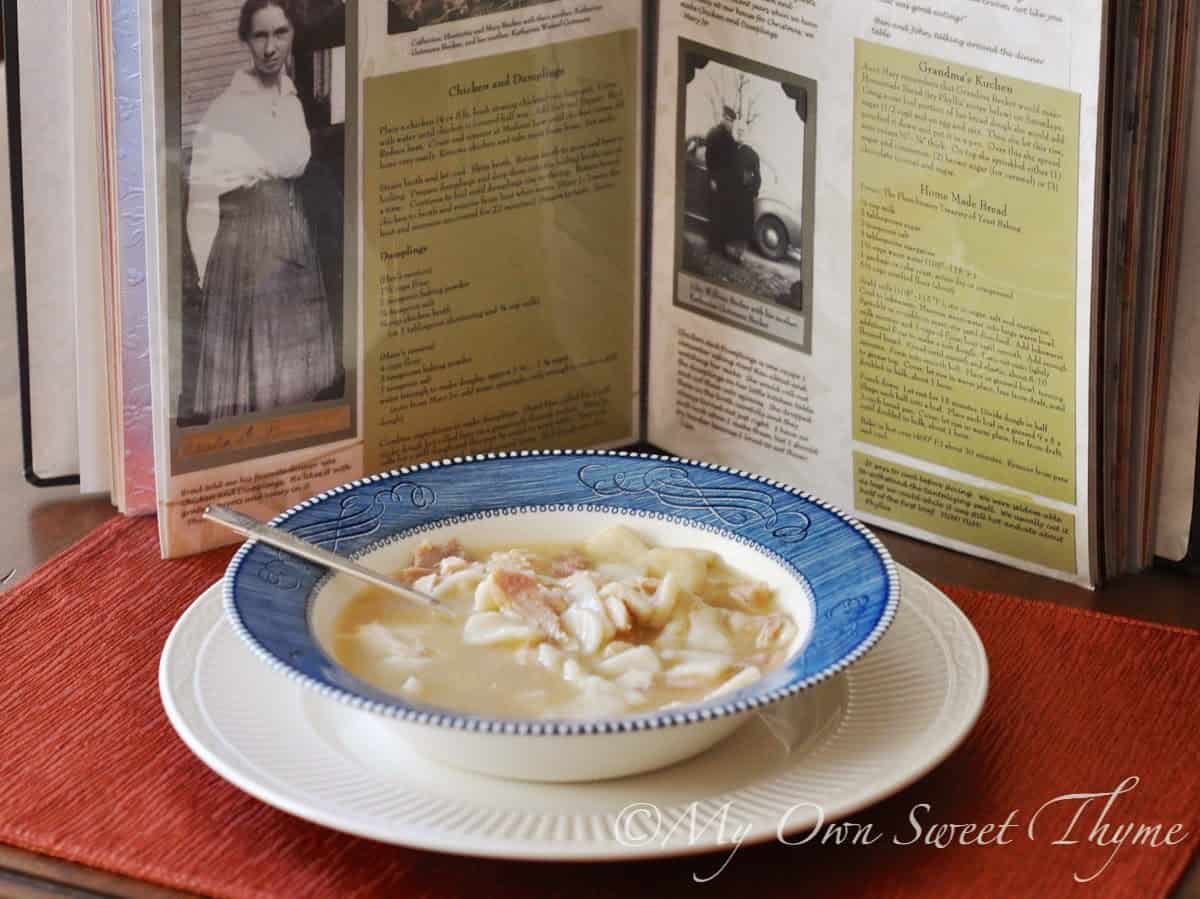
Through this process of cleaning out my files, digging into the past and talking things over with my relatives, the cookbook took shape. I took the information I was able to collect and used scrap booking supplies and techniques to create a usable and durable homemade cookbook. The finished product reflects my effort to weave the shared memories, written words, recipes and photos from my family’s past, into a coherent whole that represents the traditions of my family and explores the way they have been molded to fit into our current lives and carried forward.


The Family Heirloom Cookbook project turned out to be a success. The final product includes memories and recipes from five generations and is a wonderful collecting point for recipes I use frequently and memories of the beloved family member who first shared them with me. The recipes and photos are safely tucked into scrapbook page protectors and whenever I open it to find a recipe I want to use I see a member of my family, many who have now passed on, smiling back at me, offering a formula to help me reconnect with my history and pass something warm and delicious on to future generations in what we share around our table tonight.


One Special Page


If I had to choose one pivotal recipe from my Family Heirloom Cookbook it would be my paternal grandmother’s recipe for Chicken and Dumplings. It is a dish I loved as a child. I helped my aunt roll out the dough on her small kitchen table. Then we cut the dumplings and I watched her carefully drop them into the boiling broth. It wasn’t until I moved away from home and asked for the recipe that I learned there was no written recipe but that my aunt simply made it the way she had learned from my grandmother. Later I learned that my cousins also loved Chicken and Dumplings and though I’m not sure that we ever ate them together they, too, had worked out their mother’s recipe when they moved away from home and wanted to make it in their own kitchen. They also asked their mother to make it when they were sick, and lovingly shared it with their own families.


Now our children ask for it too. My youngest son asks for me to make Chicken and Dumplings often and it is one of his favorite dinners. And though my extended family is spread across the country, this recipe, with a few personal variations here and there, is a thread that binds us, a special tradition that we all share in common.


Chicken and Dumplings


4 to 5 lb. fresh stewing chicken


2 or 3 ribs of celery, cut in thirds


1 medium onion, quartered


several large sprigs of thyme


salt and pepper


Additional chicken broth as needed


Dumplings (see recipe below)


Rinse the chicken and place it in a large pot. Add water to the pot until half to three quarters of the chicken is covered. Add the celery, onion, thyme, salt and pepper. Boil. Reduce heat. Cover and simmer at Medium Low until chicken comes off bone very easily.


Remove chicken from the broth and take the meat from the bone. Set the meat aside and discard the bone. Strain the broth and return it to the pot. Skim and discard fat.


Note:


I often prepare the recipe to this point in the morning or the day before I want to serve Chicken and Dumplings. The chicken is easier to work with and remove from the bone when it has cooled. I remove the meat and return the bones to the pot to simmer a while longer. When I am ready to store the broth I strain it and then refrigerate it. When the broth has gotten cold it is easy to skim away the fat that solidifies on the top. After the fat is removed the broth can be put back on the stove top and heated to a boil while the dumplings are prepared.


Add enough additional chicken broth to the broth you have made so that the pot if filled with 2 ½ – 3 quarts of broth. Bring the broth to a boil over medium heat. Prepare dumplings.


Dumplings


1½ cups flour


1 teaspoon baking powder


½ teaspoon salt


¾ cup chicken broth


(or 1 tablespoon shortening and ¾ cup milk)


Combine flour, baking powder and salt in a bowl. Add ¾ cup chicken broth and stir until a dough is formed. Turn out onto a flour covered surface ( I use a Silpat silicone baking mat as a work surface to roll out the dumplings on).


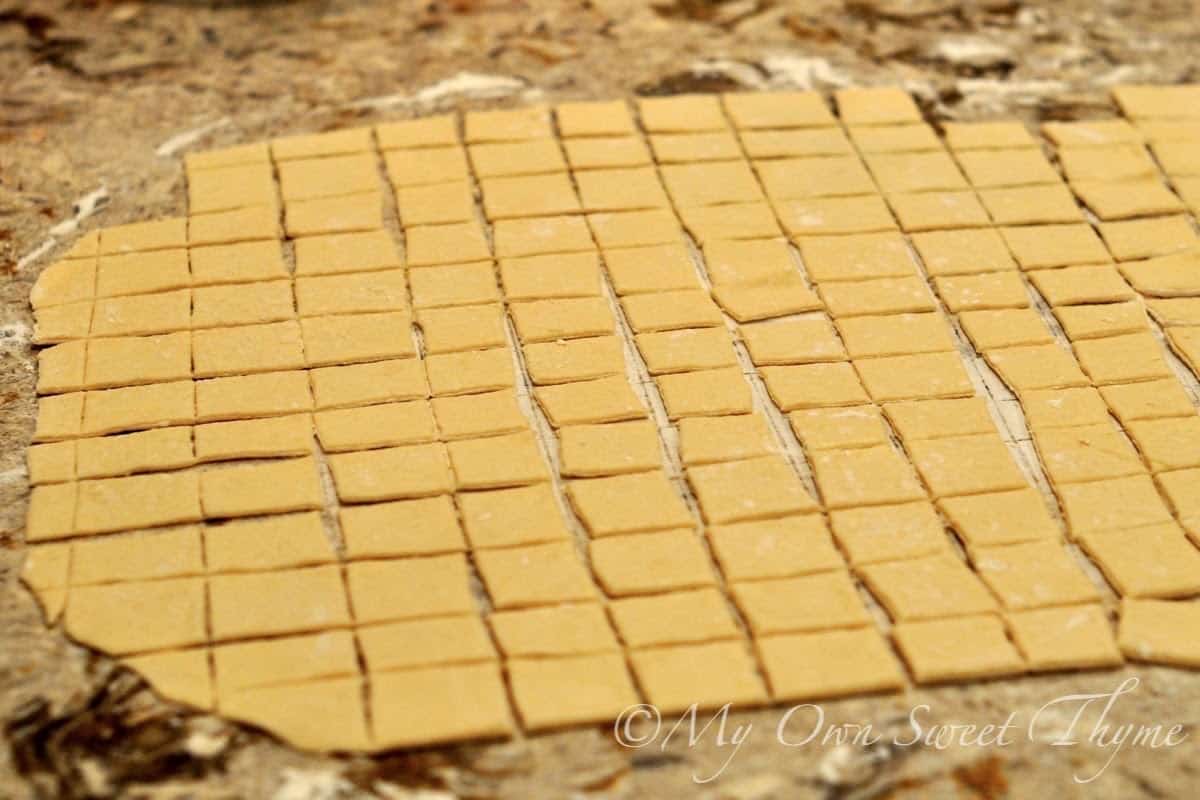
Knead several times. Roll dough out, thin (1/8” to ¼” thick). Cut into strips or squares.


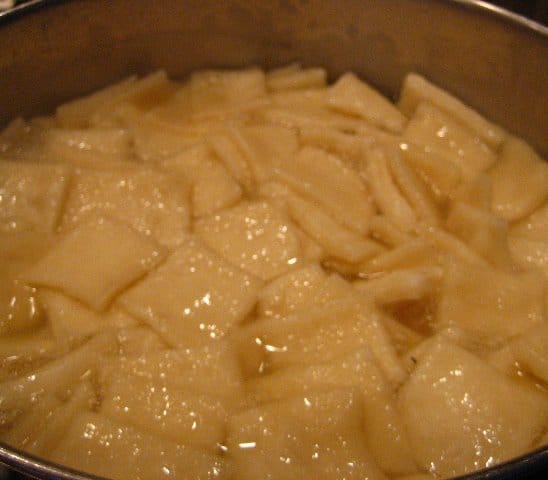
Drop the dumplings into the boiling broth, a few at a time, being careful not to splash. Continue to boil until dumplings rise to the top.


Return boned chicken to broth and simmer until heated through. Season to taste. Continue simmering until ready to serve.


Enjoy!


thumbnail

Easy Slow Cooker Taco Pasta


Prep the ingredients for this Easy Slow Cooker Taco Pasta the night before and then start it cooking in your crock pot when you are ready. With just 10 minutes prep, this comforting pasta dish couldn’t be easier or faster to make!


Ingredients


1 pound lean ground beef

salt and pepper

1 bell pepper, chopped

15 ounce can crushed tomatoes

1 cup jarred salsa (I used mild)

15 ounce can corn, drained

3 tablespoons taco seasoning (I use this easy recipe)

2 ½ cups water or low sodium chicken broth (I used one 14.5 ounce can chicken broth plus enough water to total 2 ½ cups)

12 ounces shell pasta shapes (whole grain or white)

1 cup shredded cheddar cheese


Directions


  1. Heat a large skillet over medium-high heat. Add the beef and season with salt and pepper. Cook the meat, stirring often, until browned. Transfer beef to slow cooker.
  2. Add the bell pepper, crushed tomatoes, salsa, corn, taco seasoning, and broth or water. Stir.
  3. .....
  4. Visit Easy Slow Cooker Taco Pasta @ kristineskitchenblog.com for full directions

thumbnail

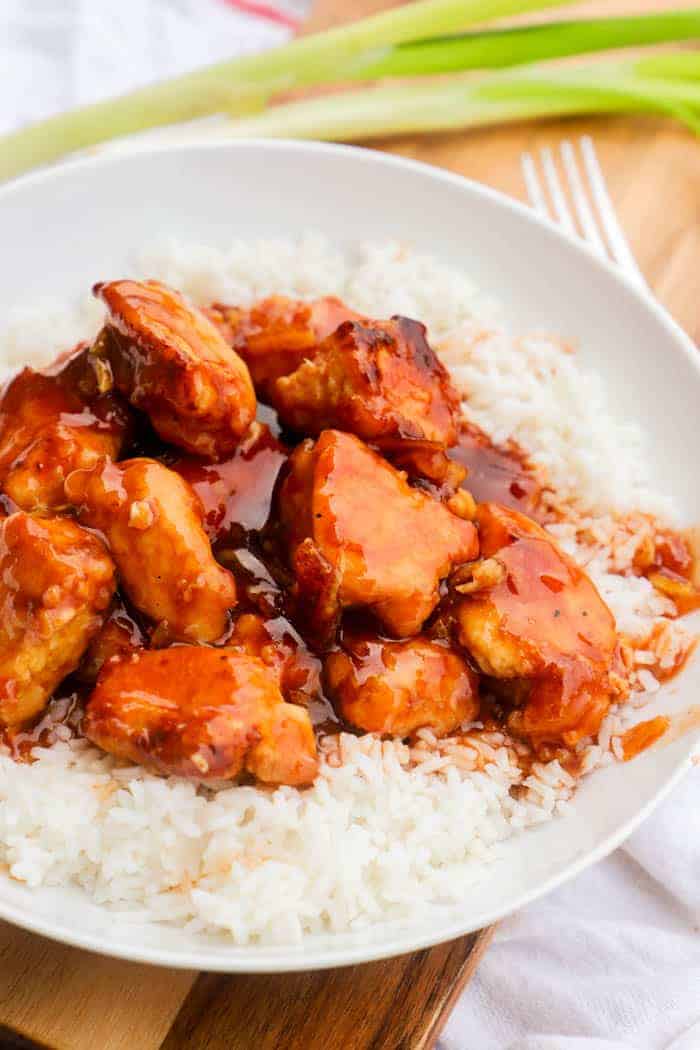
Easy Orange Chicken

If you love take-out then you are going to love this Easy Orange Chicken. Some take-out duplicates can call for lots of ingredients you don’t have. I made my orange with just easy three ingredients! Yep, just three!! You can also find a recipe video at the end of the blog post!


Easy Orange Chicken in a white bowel

Easy Orange Chicken with Marmalade:


I really enjoy cooking and creating meals for my family, so I don’t order take-out a lot. My husband loves Chinese inspired food so this was a favorite for sure.


You know I’m not going to give you a recipe with a long list of ingredients that you can’t get at your local grocery store.


The orange sauce for this recipe only has 3 super simple ingredients. After you make your easy orange chicken, grab a movie, and have a date night in! I also included a recipe video for you!


How to make Easy Orange Chicken:


Step one: Start by preparing your sauce. Using a small saucepan add BBQ sauce, orange marmalade, and soy sauce.


Whisk together and allow to cook on a simmer. While your sauce simmers get your chicken started.


Step two: Now dice your chicken breast into bite-size pieces. and prepare your skillet by heating it on medium heat and add oil.


Whisk egg together in place in a bowl. Wash chicken pieces in egg wash and then coat with flour. Add chicken to warm oiled skillet.


Step three: Allow chicken to cook for 3-4 minutes before turning over. Turn and cook until both sides are crispy.


Step four: Add chicken to a large mixing bowl and pour orange sauce over cooked chicken. Use tongs to toss and coat the chicken.


What is a good side dish for orange chicken?


We usually serve this recipe over rice with our favorite vegetable. Here are a few more of my favorite side dishes to serve with this chicken.


How to make orange chicken in the slow cooker:


I have this recipe in the slow cooker and it was so simple. You can find the ingredients and instructions here, Slow Cooker Orange Chicken.


If you tried this recipe or any of my recipes I would love to hear from you, leave me a comment below. You can also connect with me on FACEBOOK, INSTAGRAM, PINTEREST, and YOUTUBE.


I would love for you to follow along and discover more amazing recipes.


Show me what you are making, tag us or use hashtag #TDOARH


четверг, 27 мая 2021 г.

thumbnail

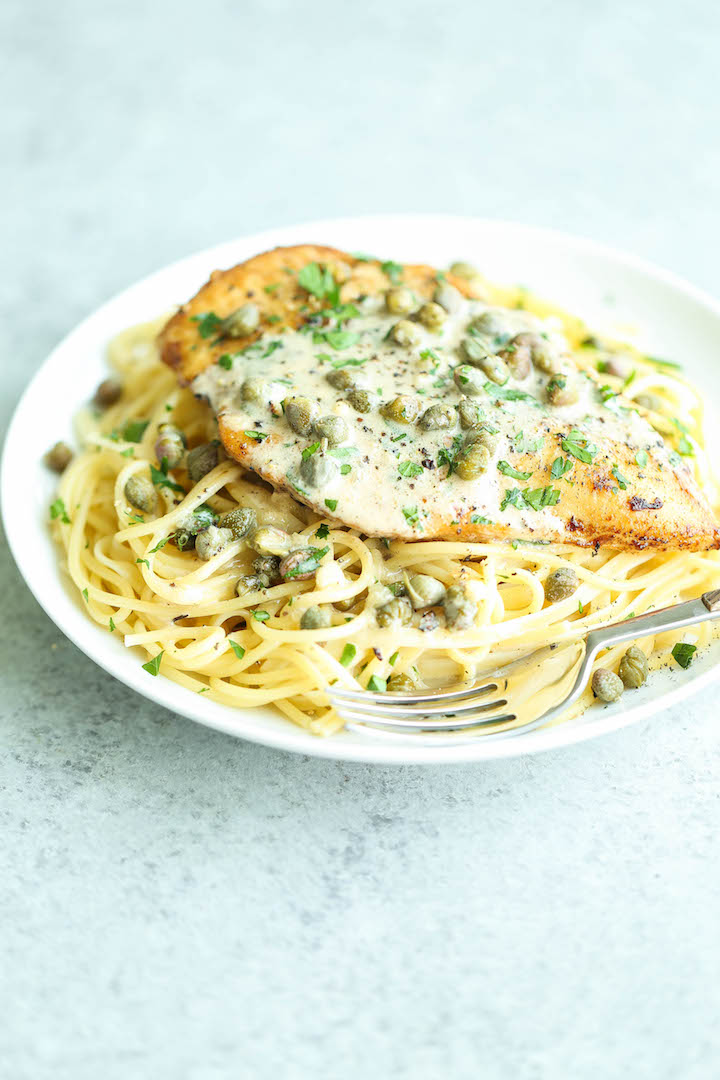
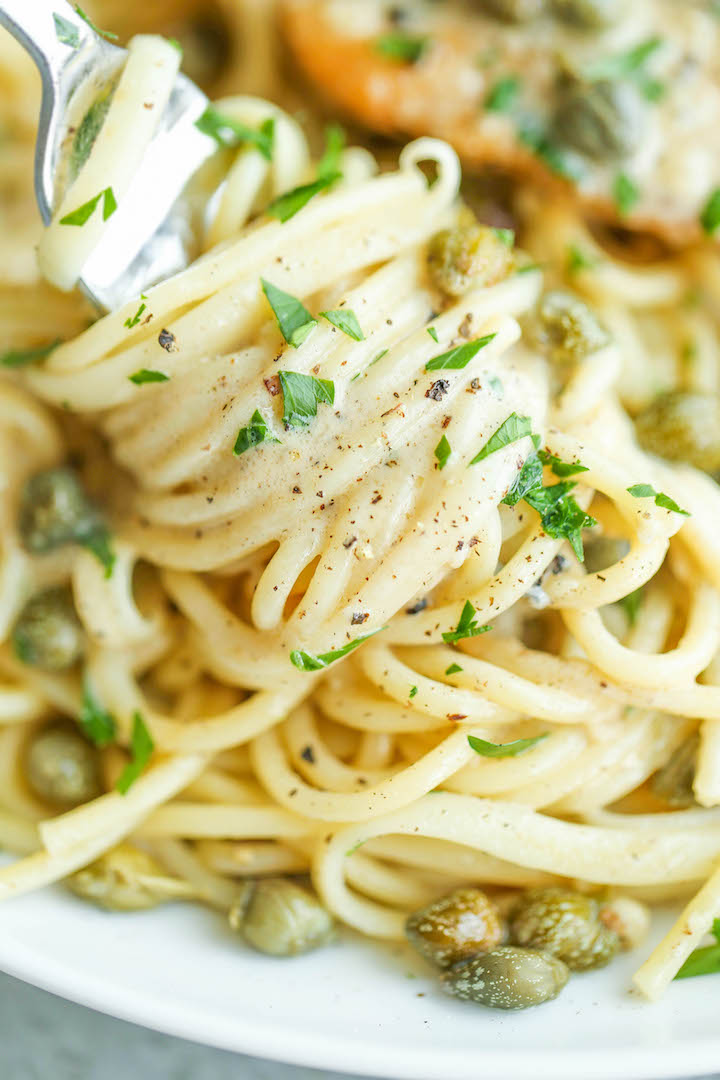
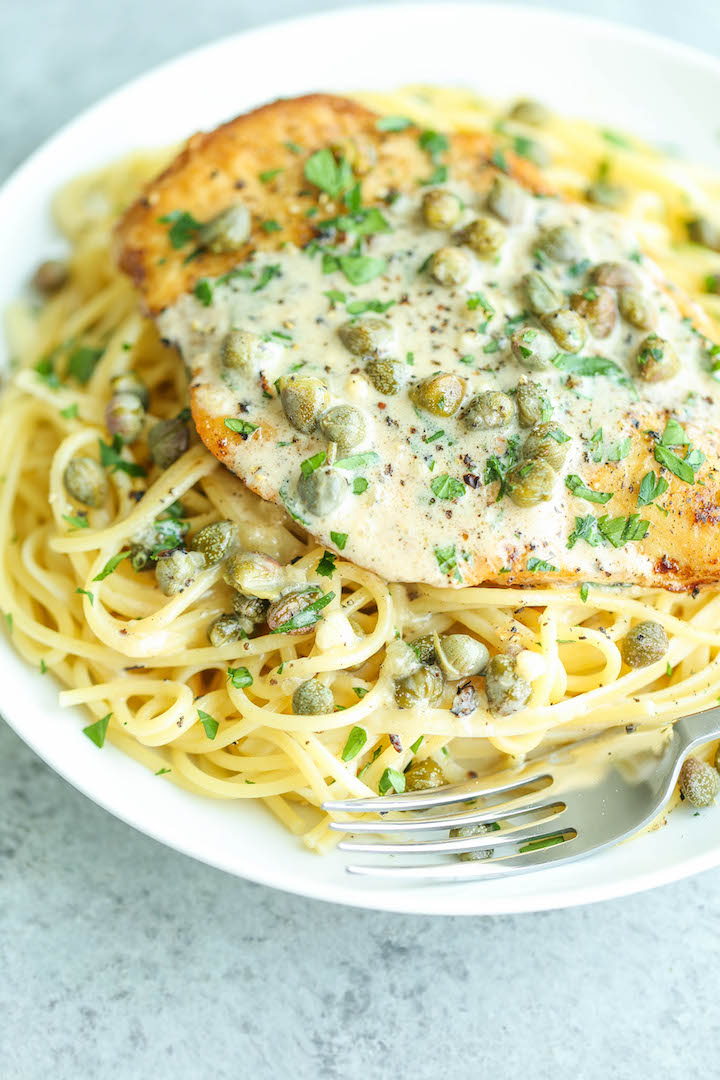
Easy Lemon Chicken Piccata

You won’t believe how quick and simple this is with ingredients you already have on hand! Serve with pasta and you’re set!


Easy Lemon Chicken Piccata - You won't believe how quick and simple this is with ingredients you already have on hand! Serve with pasta and you're set!

For today’s recipe, we need to do a quick FRIENDS recap – it’s the one with the metaphorical tunnel.


Chandler: Okay, last night at dinner, when the meals came, she put half her chicken piccata on my plate and took my tomatoes.


Ross: And that’s bad because…, you hate chicken piccata?


Chandler: Noo.


Ross: You didn’t want to share your tomatoes, tomatoes are very important to you.


Chandler: No, it’s like all of the sudden, we were this couple. And this alarm started going off in my head: ‘Run for your life! Get out of the building!’


Rachel: Men are unbelievable.


Easy Lemon Chicken Piccata - You won't believe how quick and simple this is with ingredients you already have on hand! Serve with pasta and you're set!

So yes, this recipe is pretty much dedicated to Chandler and Janice because that’s the only thing that comes to mind when I think of chicken piccata.


Except it’s really just a super fancy-looking chicken dish that’s unbelievably easy to whip up with ingredients you already have on hand, making it perfect for date night, Sunday Supper, or even a busy weeknight.


Easy Lemon Chicken Piccata - You won't believe how quick and simple this is with ingredients you already have on hand! Serve with pasta and you're set!

But more importantly, can we talk about the lemon cream sauce? I mean, you could even double the sauce, skip the chicken and just put it on a bed of pasta.


That works perfectly fine too, right?


I mean, the chicken would honestly just get in the way.


среда, 26 мая 2021 г.

thumbnail

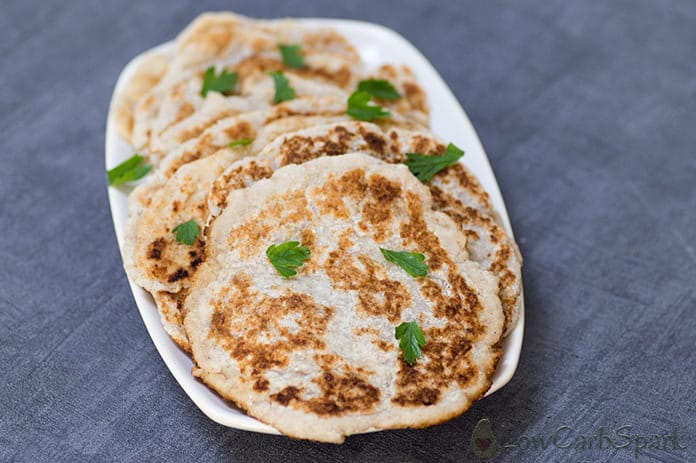
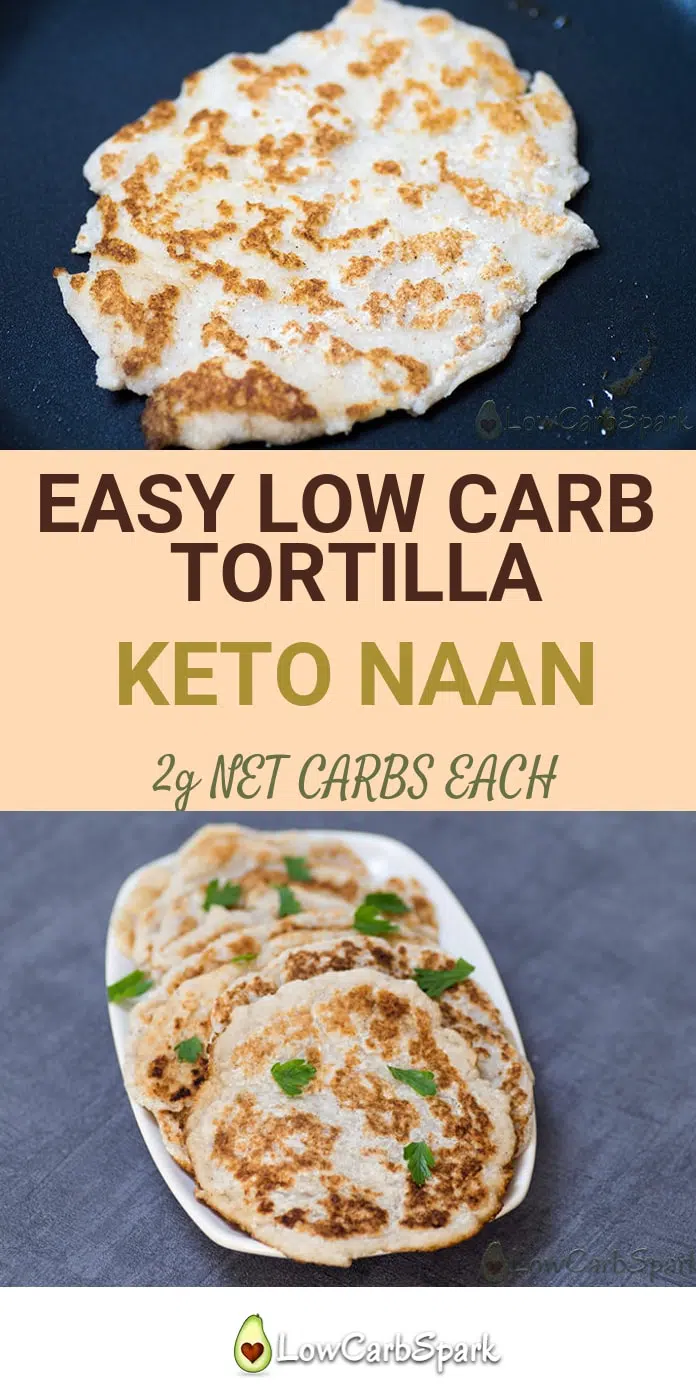
Easy Keto Tortilla – Low Carb Naan Bread – Pliable, Egg-Free & 2g net carbs

This post contains affiliate links, and we may receive a small commission if you purchase through our site.


Keto tortilla recipe that is not only grain-free, low in carbs and suitable for any high-fat diet but also egg free, vegan and paleo friendly.


Keto tortilla recipe that is not only grain-free, low in carbs and suitable for any high-fat diet but also egg free, vegan and paleo friendly.

I am craving Indian food like crazy these days. While most of the dishes are easy to turn into a keto friendly version, I started wondering how can I make their traditional bread (roti, naan) low in carbs. I discovered this recipe, and it’s definitely my favorite keto tortilla or keto naan recipe.


I like delicious tortillas to eat with curry, keto butter chicken, gravy or with different toppings such as meat, salads avocado and dressings.


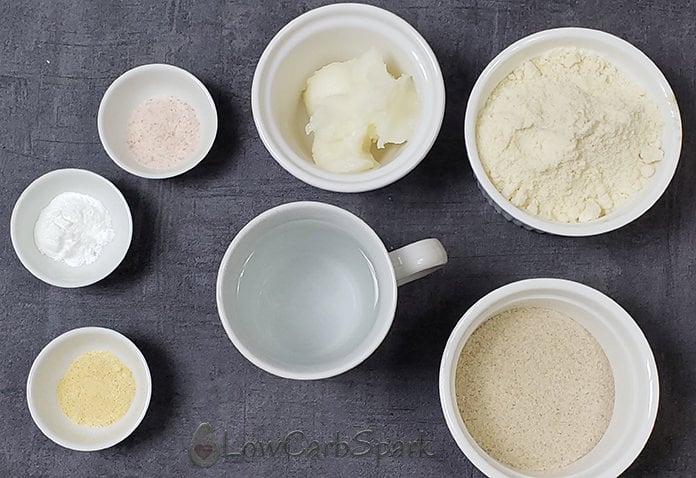
Ingredients for the keto tortilla and naan


ingredients for the keto tortilla low carb naan

Here we go again with my story, telling you how much I love simple, uncomplicated yet tasty and addictive recipes. This is one of those recipes.


Lately, I also posted more of my favorite keto bread replacements so that you can try my bagels, bread loaf or the 90 seconds bread.


No matter where you live, I sure all the ingredients can be found in the nearest food health store, or you can order them on Amazon. Here are the low carb ingredients you’ll need:


  • Coconut flour, a type of flour that absorbs well liquids and a low carb replacement for wheat flour. You can’t replace it with almond flour in this recipe.
  • Psyllium husk powder makes the tortillas stick together, giving them structure and making it closer in texture to real tortillas. You can bake or fry them in a skillet, and the result is still fantastic. I now think it would be excellent as a keto pizza crust.
  • Hot water (not boiling) is the crucial ingredient that activates the flours, and we use them instead of the eggs to avoid the eggy taste. Start by adding a cup then add more until you get a dough that is not sticky.
  • Coconut oil or Butter to give naan an amazing fatty taste. You can skip and still get a perfect paleo tortilla.
  • Seasonings of choice: garlic powder or onion powder. Adding spices will cover the slightly coconutty flavor given by the coconut flour.
  • Baking powder

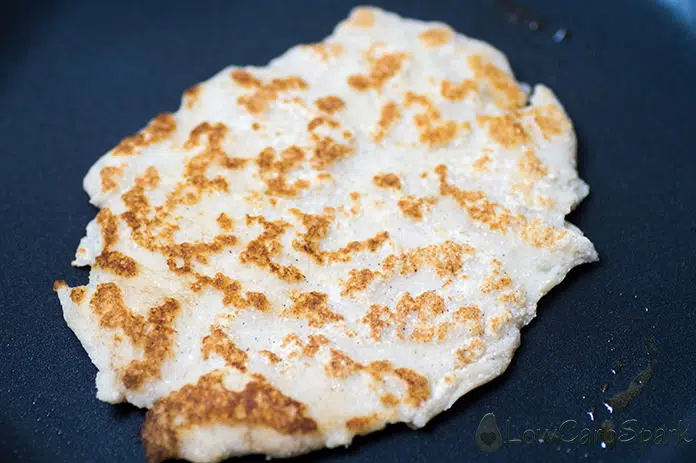
keto tortilla in the pan

Carbs and macros in keto tortillas


You’re probably wondering how many carbs, fats, and protein are in each of these flatbreads. Well, I am thrilled to tell you that one keto naan comes to only 2g net carbs.


PS: I DESIGNED A KETO PROGRAM TO DELIVER YOU THE FAST RESULTS YOU WANT, REDUCE YOUR BODY FAT, IMPROVE YOUR OVERALL HEALTH & ENERGY LEVELS. Lose 10-21lbs in the first month.


keto meal plan

  • Calories 89 kcal
  • Carbohydrates: 7g
  • Net Carbohydrates: 2g
  • Dietary Fiber: 5g
  • Fat: 5g
  • Protein: 1g

Easy Keto Tortilla - Low Carb Naan Bread - Pliable, Egg-Free & 2g net carbs

thumbnail

Easy Keto Chicken Salad Recipe

This post contains affiliate links, and we may receive a small commission if you purchase through our site.


This easy keto chicken salad with avocado and bacon is full of flavor and very satisfying. It’s made with wholesome ingredients that are very nutritious, easy to make, and loaded with healthy fats and fiber.


I want to share with you one of our favorite keto salads that’s a staple in our house. It’s super fresh and filling, a total winner, loved both by adults and children. The ingredients are delicious on their own but wait for the tangy fresh lemon dressing that brings all the flavors together. Everything is so easy to make!


A keto chicken salad is perfect to have for lunch, and any leftovers can be stored for a to-go lunch. This chicken recipe is incredibly versatile, and it’s ready within minutes.


Ingredients for the Keto Chicken Salad


I love to make effortless recipes, and this easy keto avocado chicken salad is no exception from this rule. Summer is going to end soon, so I’d rather spend some time in nature after work than in the kitchen near a hot oven.


This salad is an excellent source of protein featuring rotisserie chicken, bacon, and eggs. For healthy fats, we add avocado and olive oil in the dressing. All these ingredients are a staple in our keto kitchen.


For this refreshing low carb chicken salad you’ll need just a few ingredients that I bet you already have:


  • chicken breast – if you have leftover chicken breast, this is the best way to use it. Rotisserie chicken breast is perfect if you want to save some time.
  • avocado – is among the healthiest fruits on the planet and comes with many potential benefits. And it’s so creamy, nutty and full of flavor.
  • mixed greens – For little crunch and volume I love to add mixed greens to my keto chicken sala
  • boiled eggs – my favorite protein.
  • bacon – bacon is life and has a place in any recipe. Pairs perfect with eggs and chicken so here it is. Salty Crunchy Bacon!
  • red onion
  • fresh parsley

How to Make to Make the Keto Paleo Chicken Salad


It’s a breeze to make this easy keto chicken recipe even if you have to cook your chicken breast. Roasted or boiled it adds roughly 20 minutes.


Just take a big salad bowl, add a handful of greens then top with shredded chicken, eggs, ripe avocado, crispy bacon bits.


Toss with the delicious lemon dressing, and that’s it. That’s it! Your healthy chicken salad is ready to devour.


Serve topped with fresh parsley or coriander and with some seeds crackers for double crunch!


How to Serve Chicken Salad


This avocado bacon salad is extremely versatile, packed with protein that can be served in other ways than just plain. Here are a few ideas of how to serve this delicious chicken salad:


  • A filling for Lettuce Wraps
  • Making a keto chicken sandwich with easy 90 seconds bread.
  • As a main dish or as a side dish

How to Store Low Carb Chicken Salad


Meal prepping is a great way to save time while still enjoying homemade keto meals. This chicken salad is perfect for making in advance and even tastes better a day after as flavors develop.


To keep it fresh for longer don’t add the avocado and greens. You can assemble the salad just before serving or in the mooring to take to work for lunch!


Although lemon juice prevents the avocado from browning, I love my avocado green and freshly chopped.


Store it for up to three days in an airtight container, but it’s best served fresh.


More Keto Salad Recipes:


Recipes


вторник, 25 мая 2021 г.

thumbnail

Easy Creamy Chicken Enchiladas

  1. Heat oven to 375°F. Spray 13x9-inch (3-quart) baking dish with cooking spray. Spread 1/4 cup of the enchilada sauce in bottom of baking dish.
  2. In medium bowl, mix chicken, 1 cup of the Cheddar cheese, the cream cheese and seasoning mix with spoon, breaking apart cream cheese cubes. Spoon slightly less than 1/2 cup filling onto each tortilla. Roll up each tortilla tightly; place seam side down in baking dish. Drizzle with remaining enchilada sauce. Sprinkle with remaining 1/2 cup Cheddar cheese.
  3. Cover with foil; bake 15 minutes. Uncover and bake 15 minutes longer or until bubbly and lightly browned.

  • Pop the opened cream cheese in the freezer for about 10 minutes to make it colder so it's easier to cut into small cubes.

Nutrition

Calories590(Calories from Fat340),Total Fat37g(Saturated Fat19g,Trans Fat2g),Cholesterol155mgSodium1650mgTotal Carbohydrate33g(Dietary Fiber1g Sugars2g),Protein31g;% Daily Value*:Vitamin A20%;Vitamin C0%;Calcium30%;Iron10%; Exchanges:1 Starch; 0 Fruit; 0 Other Carbohydrate; 0 Skim Milk; 1 1/2 Low-Fat Milk; 0 Milk; 0 Vegetable; 0 Very Lean Meat; 2 Lean Meat; 0 High-Fat Meat; 4 1/2 Fat; Carbohydrate Choices:2

*Percent Daily Values are based on a 2,000 calorie diet.


thumbnail

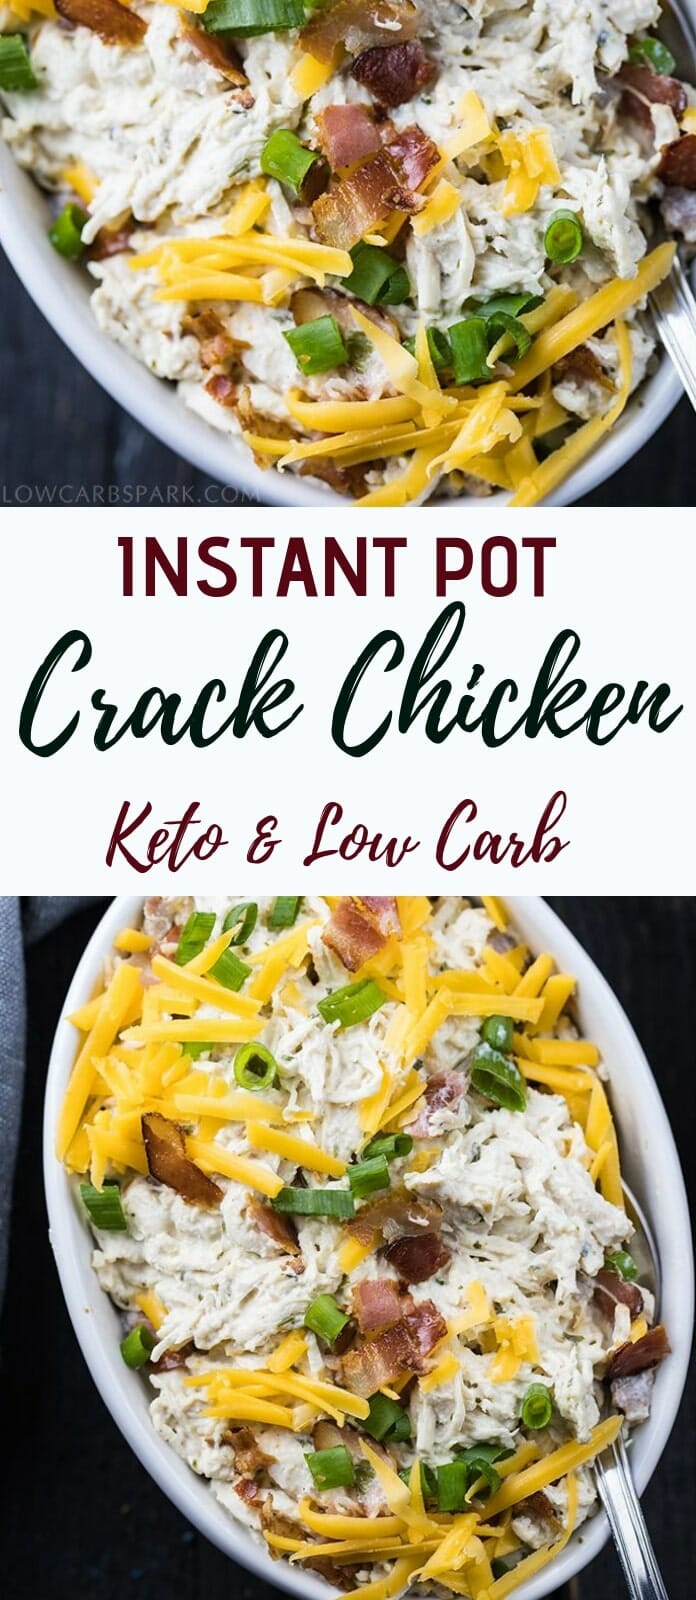
Easy Crack Chicken Recipe – Instant Pot or Slow Cooker – Keto Low-Carb

This post contains affiliate links, and we may receive a small commission if you purchase through our site.


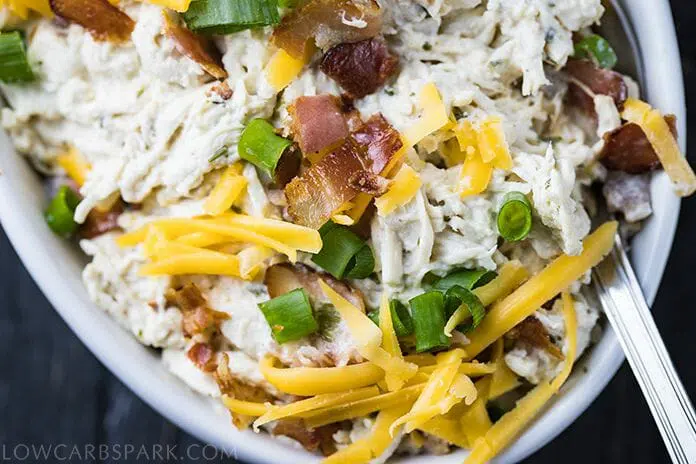
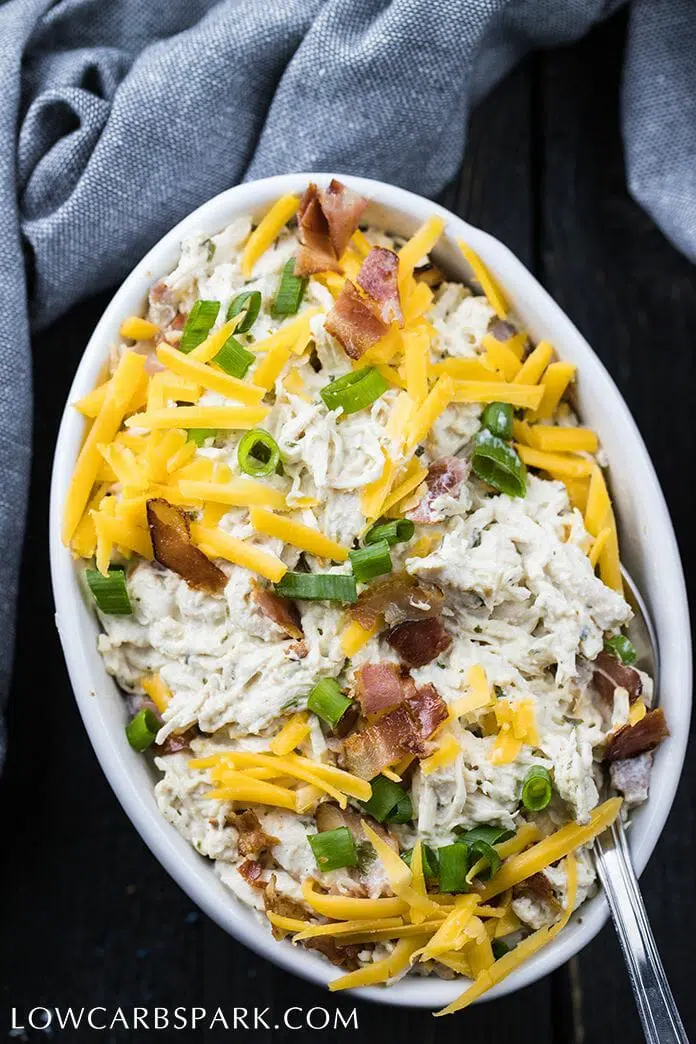
This Instant Pot Crack Chicken Recipe is incredibly creamy, cheesy, and full of delicious bacon. It’s definitely a family-friendly dinner that happens to be good for the keto diet because it’s super low in carbs.


crack chicken recipe low carb keto

I love cooking easy and quick meals in my Instant Pot. You only have to throw in the ingredients and it magically cooks the food.


While I enjoy spending time in the kitchen, creating delicious recipes for my family there are very busy days in which all I want is a warm and quick recipe. Of course, delicious is one important factor, so this keto crack chicken recipe is definitely a winner for our weeknights dinner.


What is Crack Chicken?


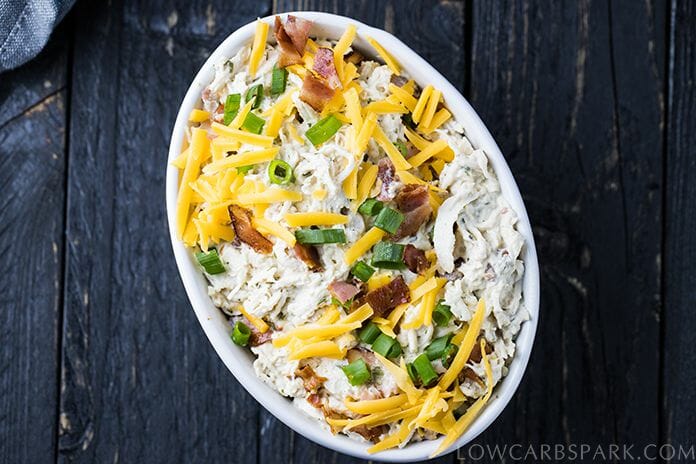
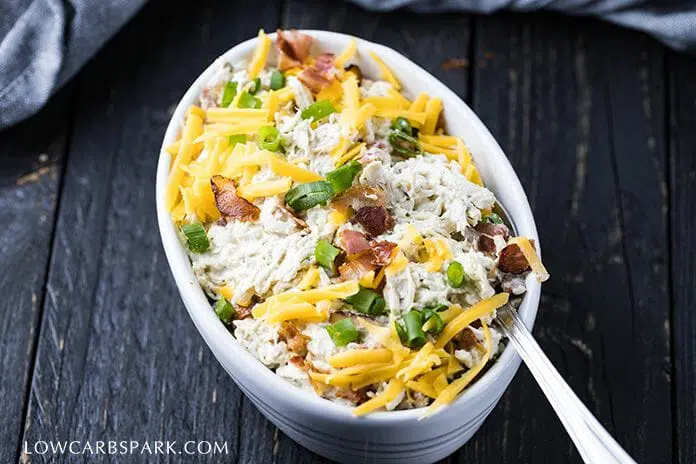
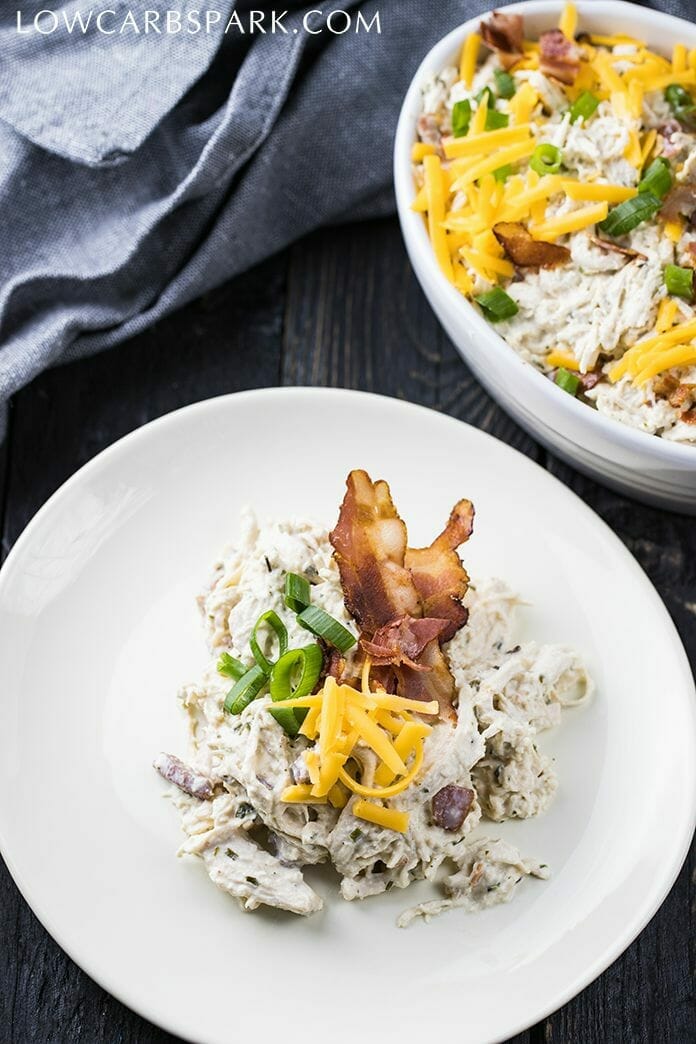
This crack chicken is the perfect combo of shredded chicken, cream cheese, cheddar cheese, bacon bits, and homemade keto ranch seasoning. It’s definitely an incredibly addictive meal and everyone keeps asking for more. You’ll end up easting the most cream, richest meal with tons of flavor in each bite.


crack chicken recipe

Keto Crack Chicken Ingredients


  • Chicken – I used chicken breast but this recipe is so delicious with boneless/ skinless chicken thighs.
  • Cheese – The quality of the ingredients is so important as a high-quality cheddar cheese will intensify the taste. Feel free to replace the cheddar cheese with low moisture Mozzarella, Pepper Jack Cheese or Provolone. You’ll also need high-fat cream cheese, we don’t want low fat here.
  • Keto Ranch Seasoning – To make this keto seasoning mix you have to combine all the ingredients listed below in the recipe card together. I prefer making ranch seasoning at home to avoid all the unnecessary and unhealthy ingredients. Often store-bought ranch seasoning contains Maltodextrin (worse than sugar), Monosodium Glutamate (enhances the flavor but very toxic for the body), Starches, etc.
  • Chicken broth – Water will work fine too but chicken broth adds so much extra flavor to the instant pot crack chicken.
  • Bacon – I always read the ingredients link of the products I but, so I can avoid the sugars and nitrites that are often added to the processed foods.
  • Instant Pot – I own a medium 6 quart Instant Pot (affiliate link), so that’s what I use for my recipes.

keto crack chicken

How to make Crack Chicken?


  1. To make Crack Chicken in a slow cooker add the chicken, cream cheese, chicken broth, and seasonings.
  2. Cover the slow cooker and set to cook for 8 hours on low.
  3. Remove the chicken and shred it using two forks or your favorite method
  4. Add the chicken back to the pot and stir in the cheddar cheese.
  5. Cook the bacon in a skillet or the oven until crispy. Let it cool and then mix it with the chicken.
  6. Serve the keto crack chicken with some low carb buns topped with green onions, bacon, and shredded cheddar.

keto crack chicken easy recipe

How to Serve Keto Crack Chicken?


I’m going to show you my favorite way to enjoy this delicious recipe to keep it keto and low carb:


How to Serve Crack Chicken?


Crack chicken is super creamy and can be enjoyed in many different ways. Some of my favorite ways to eat crack chicken:


  • Crack chicken with a side salad– Simply make a greens salad with your favorite dressing and enjoy.
  • Crack chicken sandwiches– Serve it with your favorite low carb burger buns or top a slice of my keto bread.
  • Crack chicken lettuce wraps – Place a few tablespoons of crack dip into lettuce to make delicious keto lettuce wraps or use my egg-free coconut flour wraps.
  • Crack Chicken with roasted veggies such as broccoli or cauliflower
  • Crack Chicken with Keto Mashed Cauliflower.
  • On top of steamed zucchini noodles or spinach.
  • Enjoy it as it is with a fork straight from the pot.
  • As a dip for celery or keto tortilla chips.

how to serve crack chicken keto low carb recipe
There are tons of different ways to enjoy crack chicken. What’s yours?

Can I use Frozen Chicken?


Yes, using frozen chicken is totally fine in this crack chicken recipe. Just adjust the cooking time.


PS: I DESIGNED A KETO PROGRAM TO DELIVER YOU THE FAST RESULTS YOU WANT, REDUCE YOUR BODY FAT, IMPROVE YOUR OVERALL HEALTH & ENERGY LEVELS. Lose 10-21lbs in the first month.


keto meal plan

When I’m making this recipe with frozen chicken I cook on manual for 25 minutes, followed by 5 minutes of natural release. Release all the pressure and shred the chicken.


Other Delicious Chicken Recipes


Easy Crack Chicken Recipe - Instant Pot or Slow Cooker - Keto Low-Carb

понедельник, 24 мая 2021 г.

thumbnail

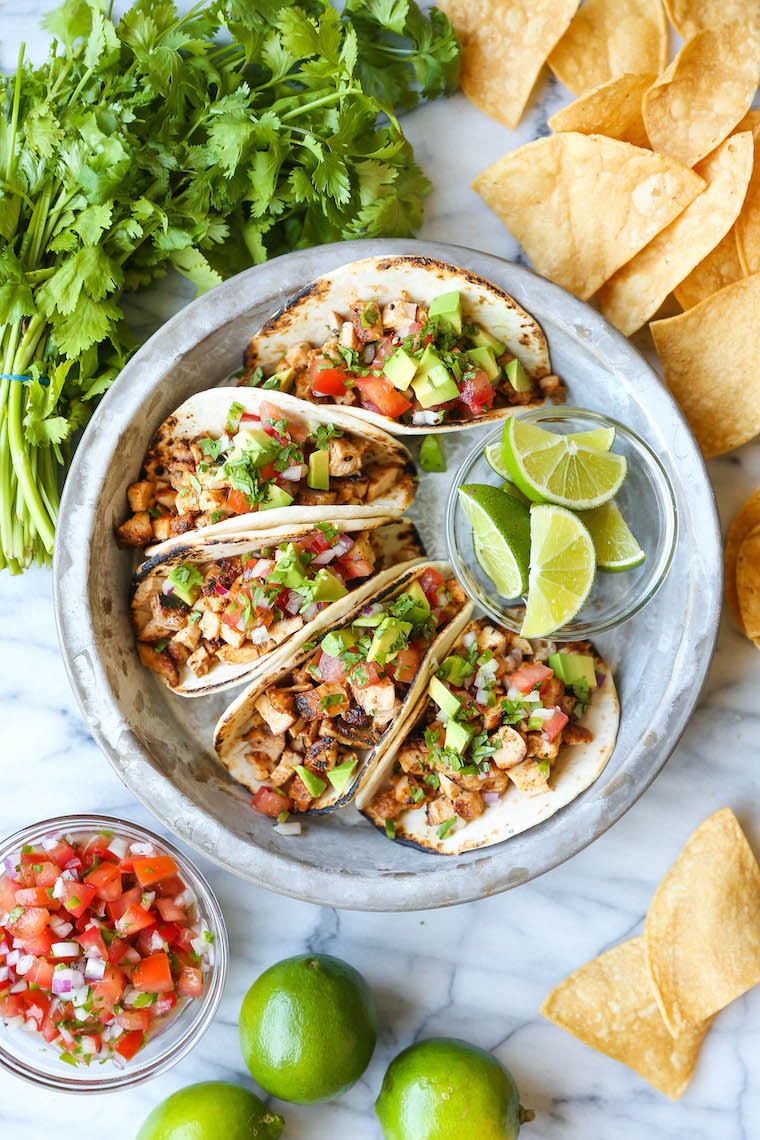
Easy Chicken Tacos

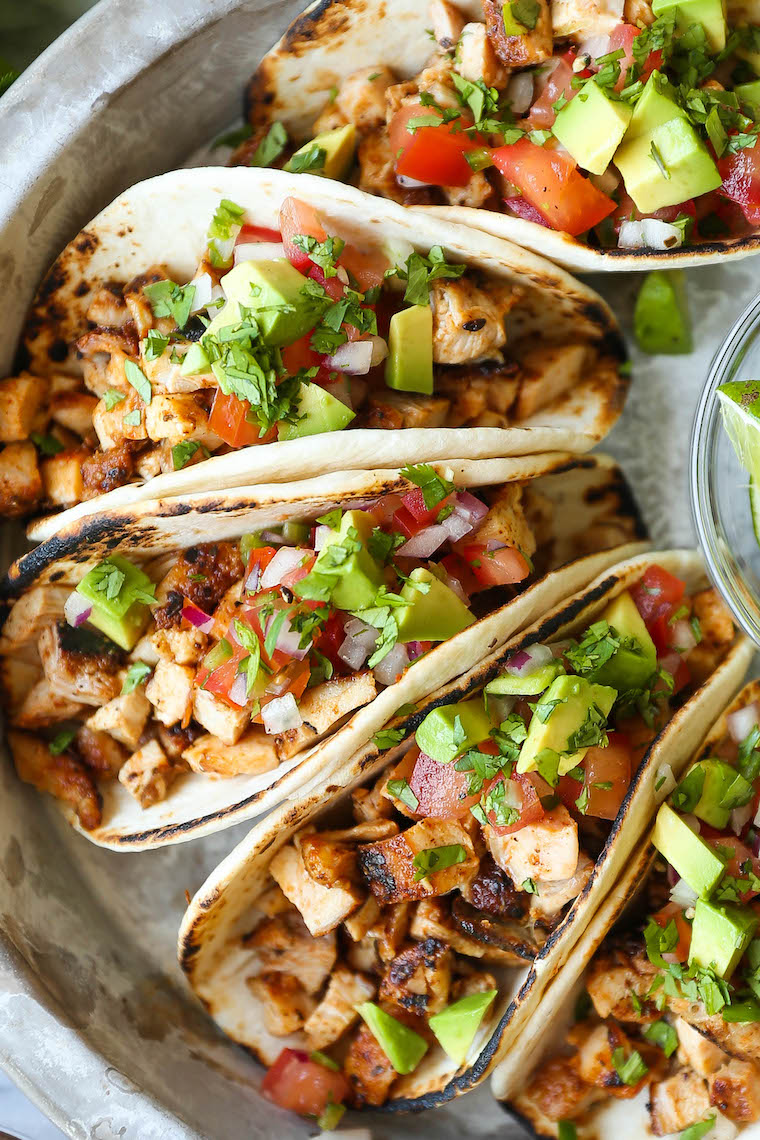
With a simple spice rub, the chicken is cooked so quickly on the stovetop! Dice into small pieces and serve with pico, avocado + lime!


Easy Chicken Tacos - With a simple spice rub, the chicken is cooked so quickly on the stovetop! Dice into small pieces and serve with pico, avocado + lime!

I think this will be my go-to weeknight meal for the next few weeks. No, wait, months probably.


Because, guys, we just brought home a little baby corgi brother for Butters. So to say my hands will be full with these two little buggers is clearly an understatement.


So enter the easiest weeknight chicken tacos ever.


With a simple spice rub – chili powder, cumin, paprika, oregano, garlic powder – the chicken is seasoned just right, thrown on the skillet and cooked through completely before dicing them up into bite-size pieces.


Serve in warmed tortillas with desired toppings – pico de gallo (store-bought shortcut is just fine here!), diced avocado, cilantro and freshly squeezed lime juice is my favorite combo right now!


Easy Chicken Tacos - With a simple spice rub, the chicken is cooked so quickly on the stovetop! Dice into small pieces and serve with pico, avocado + lime!

thumbnail

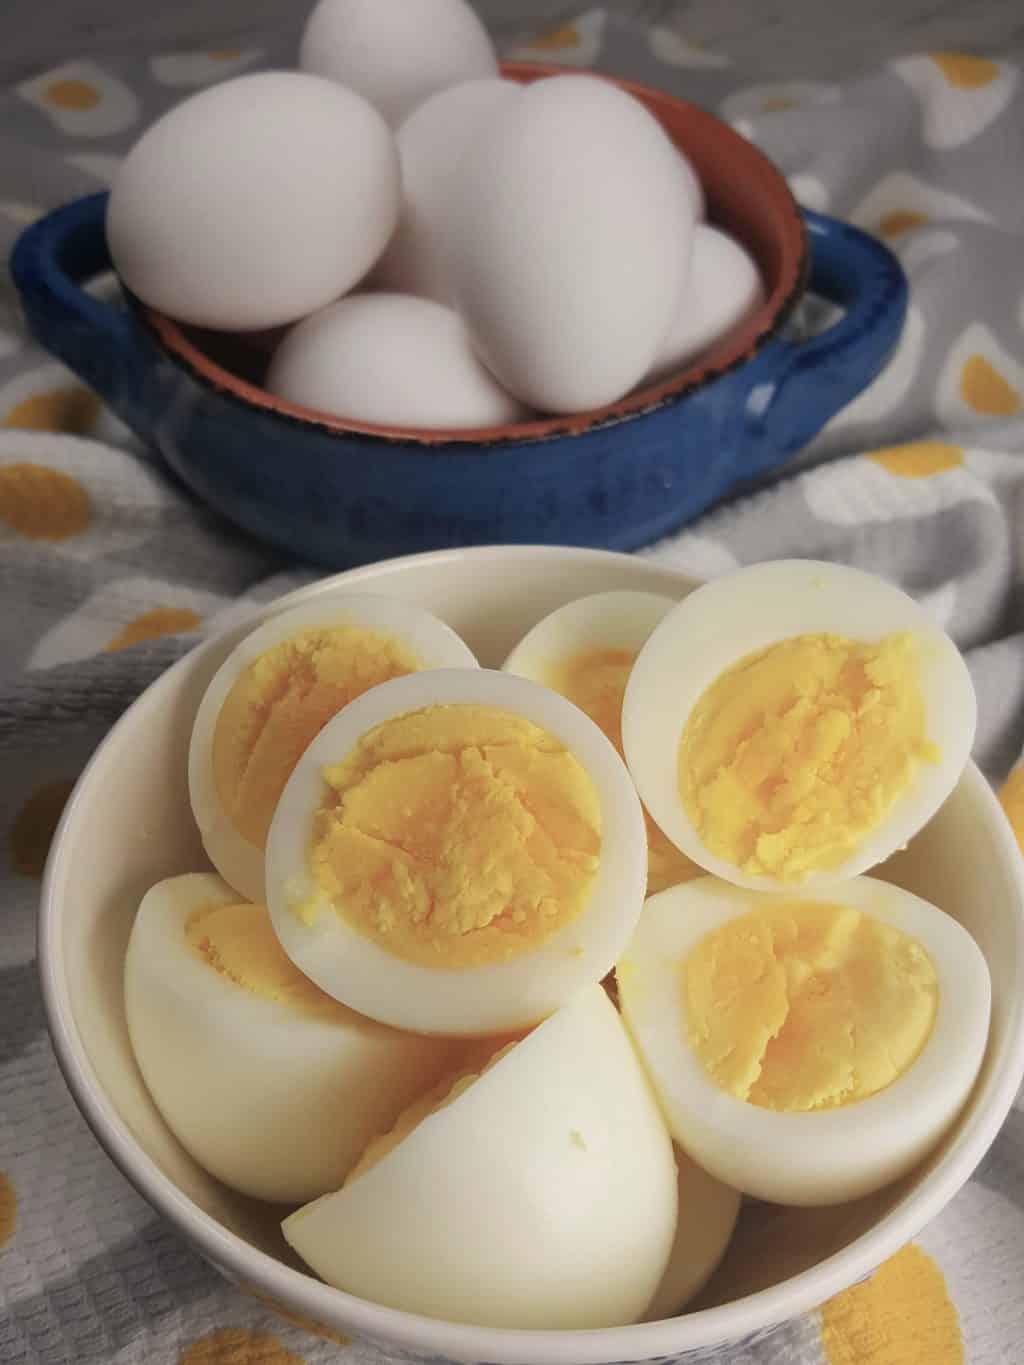
Easy Air Fryer Hard Cooked Eggs {as good as Hard Boiled}

Air Fryer Hard Cooked Eggs sounds ridiculous, but is such a simple recipe method and there is no babysitting. Plus, it actually works and works well.


Air Fryer Hard Cooked Eggs


Air Fryer Hard Cooked Eggs

I know, weird huh?


Or is it????


That’s right!, you can make Hard “Boiled” Eggs right in your Air Fryer.


Well, without the water, hence the name, Air Fryer Hard Cooked Eggs.


My first post about cooking Eggs is my Pressure Cooker Hard Boiled Eggs post. It took the Instant Pot and Pressure Cooking groups by storm. I think everyone does their Eggs my way now.


Another fun way to make Hard Cooked/Boiled Eggs is to crack them into a pan with my Egg Loaf Method! This method is great for make Potato Salad or Egg Salad.


But, Air Fryers are so popular and I just had to do some Hard Boiled Eggs in my Air Fryer.


My Air Fryer Hard Cooked Eggs recipe/method is just as easy as my Instant Pot and Pressure Cooker methods, as in this recipe, like the others, there is no need for an ice bath or a cool water bath!!!!


Cast of Ingredients for Air Fryer Hard Cooked Eggs


All you need is a Trivet and some Fresh Large Eggs.


I just used the Trivet that came with my Instant Pot Pressure Cooker.


There is actually a Trivet, designed for Eggs. It’s great…I just could not find mine today.


Pile up as many Eggs as you like and you are good to go!


While they are cooking, you can go about your business, as there is no watching.


Another really easy and healthy recipe for the Air Fryer is my Air fryer Cleo Hollywood Brussels Sprouts.


The Eggs will finish up the cooking process, during the cool down period, after their time in the Air Fryer.


Alternatively, if you want, you can add another minute to the cook time, pull them out of the Air Fryer and then place them in an ice bath. But really, what’s the point? That just takes more effort, another bowl to wash and the total time to eat eggs is the same anyway!


The shells peel off so easily.


One of my favorite Air Fryer recipes is my Air Fryer Chinese Salt & Pepper Chicken Wings.


I also love my Air Fryer Fried Zucchini with Apricot Sauce. Check out the blog for more delicious recipes. There are over a hundred really yummy recipes.


So sorry about my lighting. I have no idea why the photos are so poorly lit for this recipe shoot.


Kitchen Equipment and Essentials


Caring is sharing! If you would like to support This Old Gal, please share this recipe on Social Media, so that I can continue to bring you more wonderful recipes!


Here is the handy printable recipe:


Air Fryer Hard Cooked Eggs


PIN this Air Fryer Hard Cooked Eggs!


пятница, 21 мая 2021 г.

thumbnail

Easy & Healthy Grilled Chicken Margherita


Quick, easy, and so delicious! This 30 minutes fabulous recipe with such a wonderful display of colors make you really wonder: Why go out if we can eat at home like this?

This perfectly juicy and seasoned grilled chicken margherita topped with gooey, melty mozzarella cheese, pesto and tomato basil relish is not only healthy but also absolutely delicious and a great melding of flavors. Light, yet filling this dish is even tastier when using all the fresh ingredients. So tasty, you will be making this dish over and over again in the future.


=================================


Easy & Healthy Grilled Chicken Margherita

Ingredients
4 boneless skinless chicken breasts, pounded to less than 1 inch thickness
salt and pepper to taste
2 tablespoons olive oil
1 teaspoon garlic powder
1 teaspoon Italian seasoning (OR ½ teaspoon dried oregano + ¼ teaspoon dried basil + ¼ teaspoon dried thyme)
4 slices mozzarella cheese
½ cup basil pesto (try my easy 5 minute pesto recipe – it’s the best!!)
½ cup cherry tomatoes, halved
1 tablespoon fresh lemon juice
¼ cup packed basil leaves, very thinly sliced
cracked black pepper


Get your full written recipe and helpful tips as well as many other delicious recipes at: Creme De La Crumb


Thanks to Tiffany for this amazing recipe and featured image!


четверг, 20 мая 2021 г.

thumbnail

Earl Grey Cake with Rhubarb Cream Cheese Glaze

earl_grey_rhubarb_cake-6_filtered

I'm alliiiiveee! Well sort of. It's been a very icky, snotty, exhausting week in bed. I managed to catch myself one nasty b*tch of a bug, one that was so bad that even A (who proudly boasts that he only gets sick once every 5 years) caught it too. So that meant that when I finally started feeling a bit better I forced myself out of bed to make him honey lemon drinks and huge pots of chicken soup. Other than that most of last week was spent in bed, watching Buffy and eating lots of comfort food. I may or may not have eaten an entire tray of Sara Lee chocolate cake (I know who to blame for my rekindled love of their frozen cakey goodness).


earl_grey_rhubarb_cake

But finally, after many Sudafed-induced sleeps I was better enough to get back into the kitchen to bake something. It's always a very obvious sign that I'm very sick if I don't even have the energy to bake, usually when I'm feeling a little under the weather I still manage to whip up some scones. So today I kept things pretty simple, I don't quite have the energy for one of my crazy baking experiments just yet. I just wanted a lovely sweet tea cake to nibble on.


earl_grey_rhubarb_cake-3_filtered

I love tea so effing much. Every kind of tea. Chinese teas, Japanese green tea, a milky English Breakfast, give it to me by the bucketload. But other than matcha flavoured desserts I haven't tried too many tea-flavoured desserts. Earl Grey seemed like the obvious choice to try out, with its distinctive bergamot aroma and flavour. I had a bunch of rhubarb waiting to stewed and I always love the combination of rhubarb with any kind of citrusy flavour, so I decided to try an Earl Grey Tea Cake with a Rhubarb & Cream Cheese Icing. At first I was imagining swirls of lusciously thick cream cheese icing, but as I started making it I realised that a glaze would work much better. The icing was quite sweet so I didn't want too much of it on the cake, plus I had to use quite a high ratio of rhubarb puree so that it wouldn't be overpowered by the flavour of the cream cheese. I love the light pink colour that the rhubarb gave the glaze, it just looks so inviting and fresh drizzled over the cake.


earl_grey_rhubarb_cake-2_filtered

The exterior look and feel of the cake itself is quite deceptive. It looks appears slightly dense and heavy, but when you cut yourself a slice you find a beautiful fluffy centre with just the right amount of flavour from the Earl Grey. It's not too strong but you can definitely notice its presence. I actually quite like the mottled banana-bread-like appearance that the loose tea leaves give the cake. The first thing you taste is the sweet rhubarb mixed up with smooth cream cheese and just a hint of lemon zest, then you're left with the light aftertaste of the bergamot. It's one of those lovely girly cakes that you just want to sit down and share with your girlfriends over a cup of tea.


earl_grey_rhubarb_cake-5_filtered

Earl Grey Cake with Rhubarb Cream Cheese Glaze

(Adapted from this Earl Grey Tea Cakes recipe from Good Taste)

2 Earl Grey tea bags (about 3 tsp leaves)

60ml (1/4 cup) boiling water

80ml (1/3 cup) milk

100g butter, at room temperature

2 eggs

160g (2/3 cup) caster sugar

190g (1 1/4 cups) self-raising flour


For the glaze: (this made quite a lot of glaze for me, you could halve it if you like)

150g rhubarb, diced

Zest of 1 lemon

2 tbsp caster sugar and 1 tbsp water

125g cream cheese, softened

1 cup (150g) icing sugar, sifted


Preheat oven to 180°C (350°F). Grease and line a 20cm round cake tin. Empty the tea leaves from the tea bags into a cup and add the boiling water. Set aside for 3 minutes then add milk to cup.


Place butter and sugar in a large mixing bowl and beat with an electric mixer on high speed until light and fluffy. Reduce speed to medium and add eggs one at a time, beating until smooth. With the mixer on low, gradually add flour and tea mixture, alternating between wet and dry ingredients. Beat until just combined.


earl_grey_rhubarb_cake-12

Pour mixture into prepared tin and bake for 25-30 minutes or until golden and a skewer inserted in the cake comes out clean. Remove from the oven and set aside for 2-3 minutes before turning onto a wire rack to cool completely.


While the cake is baking and cooling, place rhubarb in a small saucepan on low heat with lemon zest, sugar and water. Stirring occasionally, simmer rhubarb until soft and cooked through, about 10 minutes. Remove from the heat and set aside to cool. Puree mixture in a food processor or blender. Place cream cheese in a large mixing bowl and beat until smooth. Add sifted icing sugar and rhubarb puree and beat until smooth. Pour over the top of cooled cake and serve immediately. Can be refrigerated overnight.


earl_grey_rhubarb_cake-4_filtered


About

Поиск по этому блогу

Технологии Blogger.